GroovePages is trending nowadays in the website designing and sales funnel building industry.
This is the only tool that is completely free for a lifetime. No other tools available in the market are offering functionalities like GroovePages for Free.
So more and more people have started using GroovePages for their online marketing needs.
But these tools are sometimes very complicated. So people having basic knowledge can’t use these tools easily and face problems creating websites and funnels.
How to use GroovePages?
GroovePages is built for people who have very basic knowledge of these marketing tools. Newbies can easily make websites and sales funnels using GroovePages and GrooveFunnels. No need for any experience of website builders or sales funnels builders.
So here we have written a step-by-step guide to starting with GroovePages.
By following this guide you can set up your brand new GroovePages account and start building websites.
You don’t need a domain to start with GroovePages. You can build your website on a subdomain on GroovePages as well. We have also covered the subdomain setup process on GroovePages in this guide for your ease.
In the last, In this GroovePages Tutorial, we have also covered the website publishing process where you can learn how to publish your website on GroovePages.
Create GroovePages Account
Create GroovePages Account
GroovePages is a tool that is useful for creating websites. It’s a completely free tool. GroovePages is a part of GrooveDigital.
With a Free account with Groove, you will get also access to other 15+ Apps. Apps like Page Builder, Sales Funnel Builder, Email Autoresponder, ECommerce Platform, Payment Processor, Affiliate Management Tool, Webinar Management, Membership Management & Blog Platform.
All these apps are free with Groove Account.
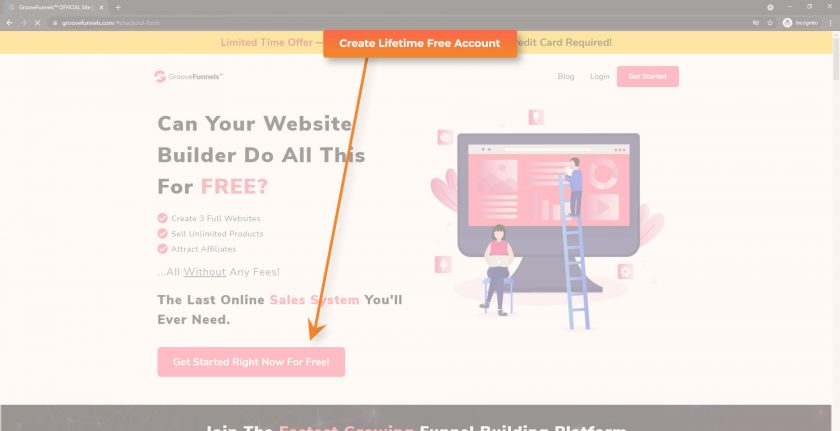
You can simply create a free account with a blue button on the ride side or bottom on a mobile device.
After creating a free account you can immediately start using Groove Apps.
You can create also create a free GroovePages account here >>
Set up Subdomain
Set up Subdomain for website access
You can start building your website without purchasing a domain name. GroovePages allows you to set up a subdomain where you can access your life pages & websites.
So before doing anything on your free account, you should set up your subdomain.
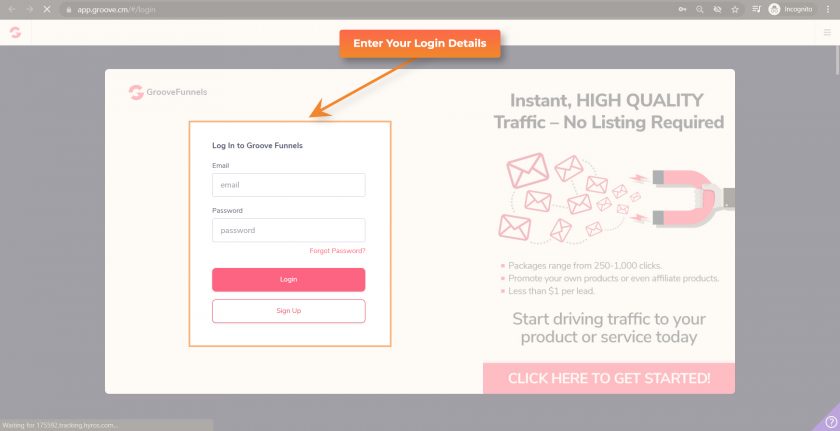
For subdomain setup first log in to your account with this link. GroovePages Login >>
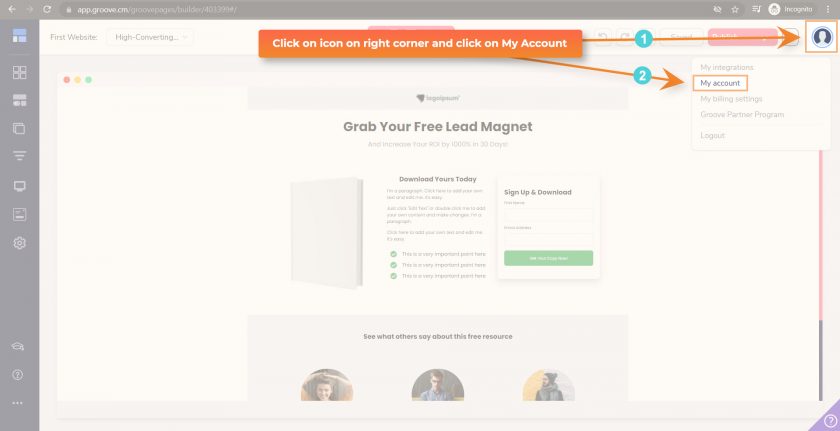
After login, you will be redirected to Groove Dashboard.
Now click on the user icon on the right top side of the dashboard and in the presented menu click on the My Account.
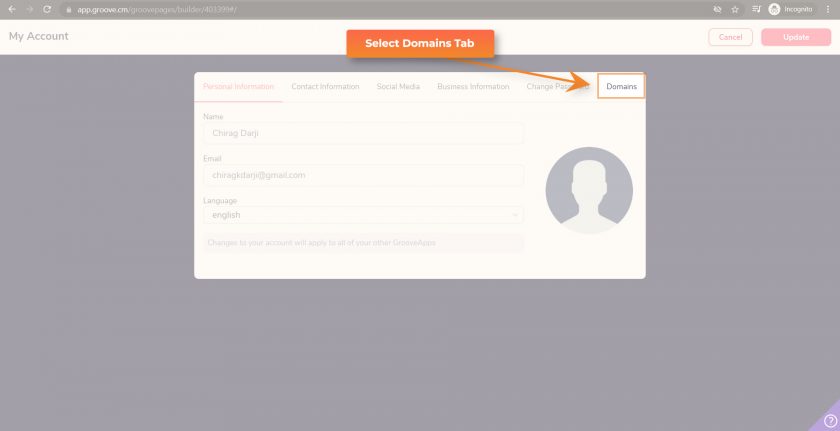
In the presented popup click on the Domains tab.
Select left box GroovePages Subdomain
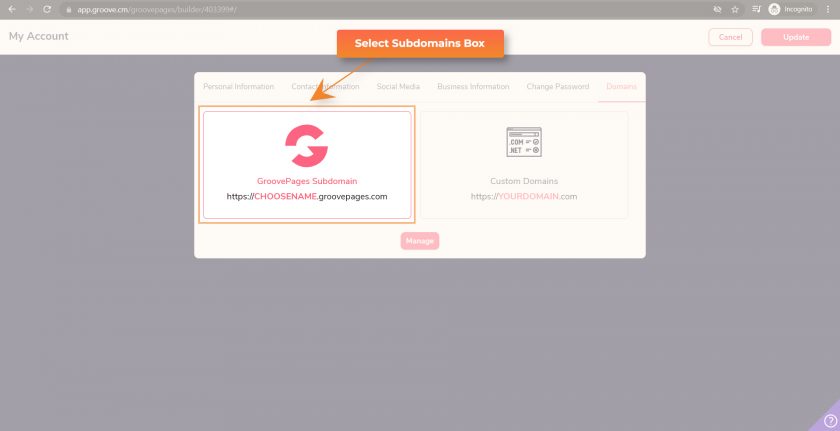
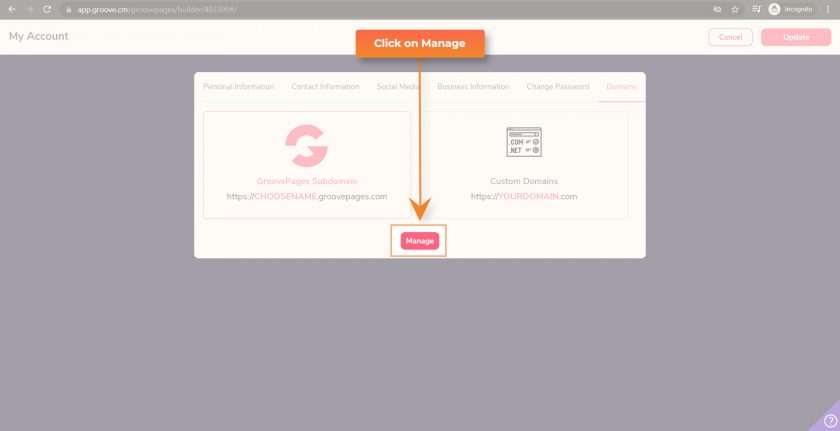
Now click on the Manage button
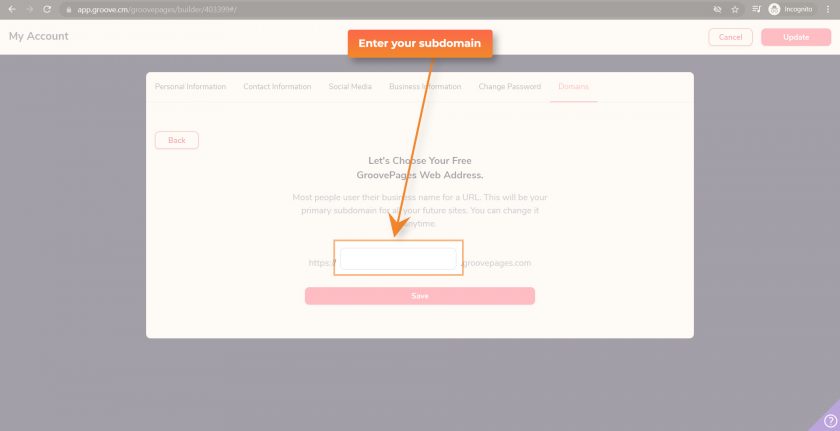
Enter your subdomain name in the given text box.
Now click on the Save button
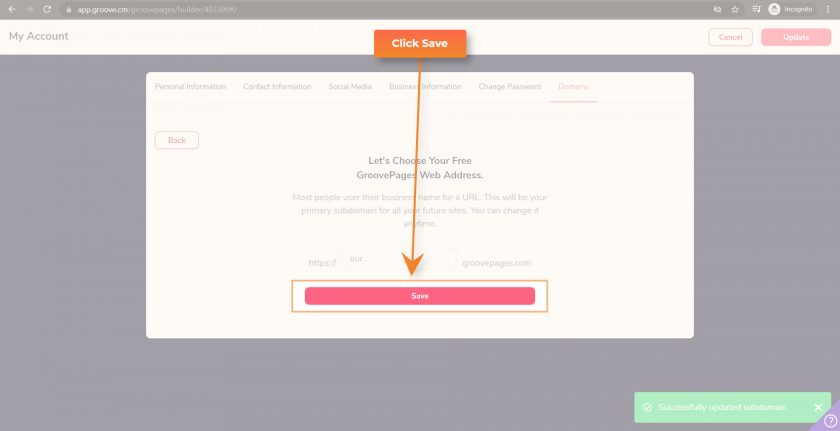
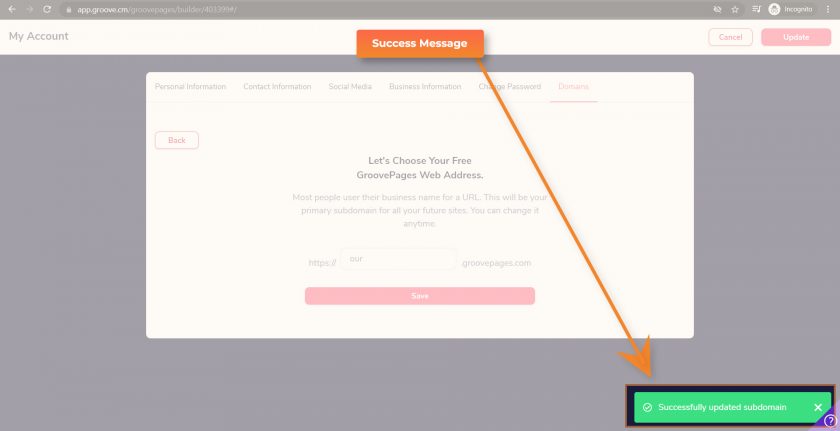
Check it is saved or not by checking the green message box on the bottom.
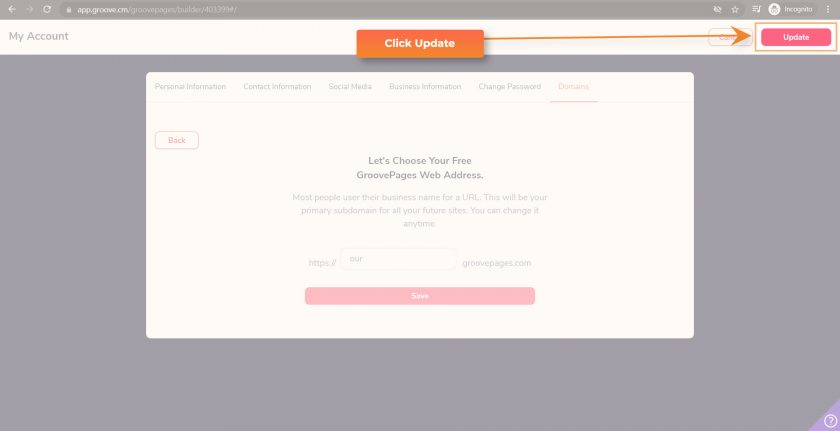
Now click on the Update button on the top right side.
Now your subdomain is successfully set up. You can now publish your website on your GroovePages hosted subdomain.
After subdomain set up let’s start building your first website.
Build New Website
Start Building Your First Website
For starting website building you need to log in first. After login, you will be presented Groove Dashboard.
If you are presented with another page on which they are promoting GrooveFunnels Affiliate Program you can click on the My Dashboard button on the top right.

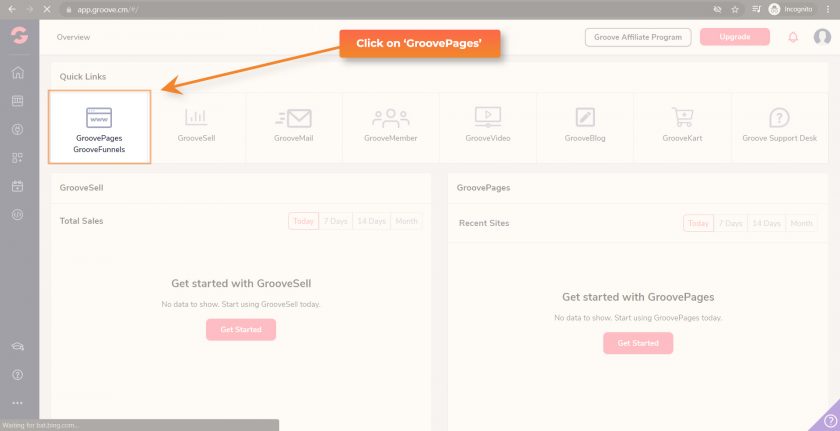
Click on the GroovePages tile
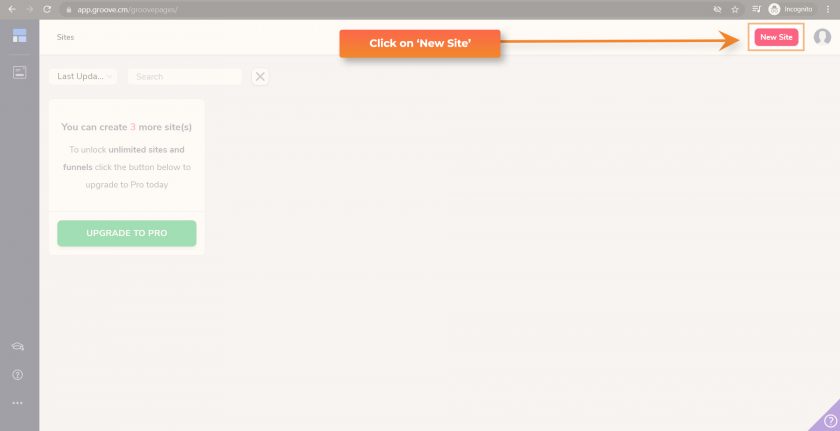
Click on the New Site button on the top right
There are many design templates in the GroovePages library. Templates are sorted into different categories.
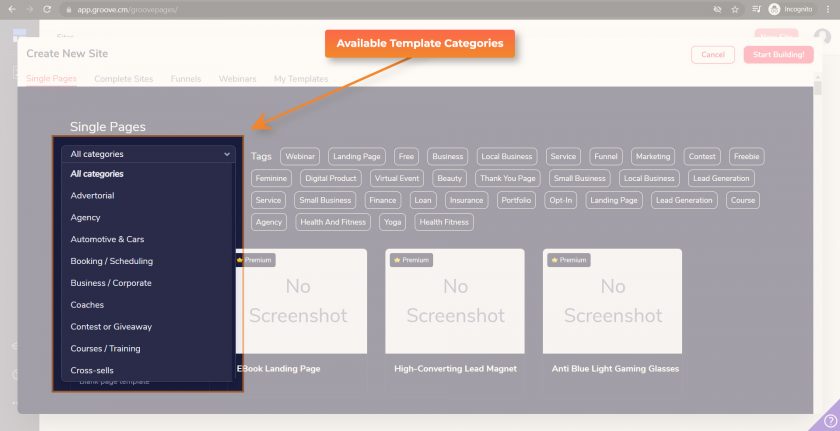
You can select a template category from the dropdown list.
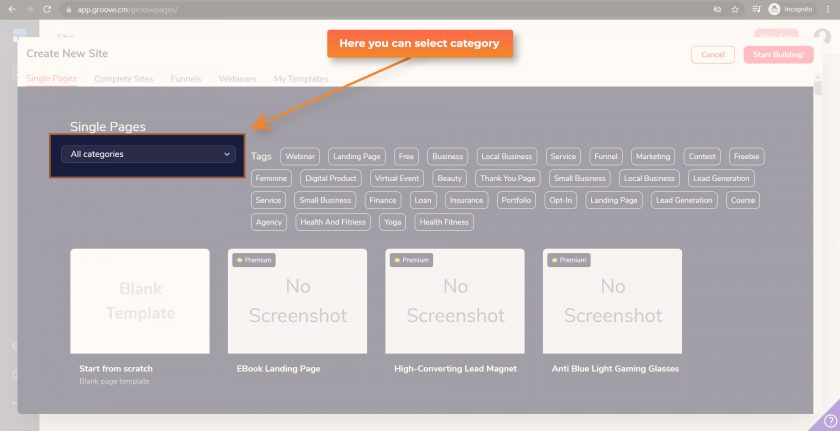
You can check specific category layouts by selecting a particular category or you can check all layouts.
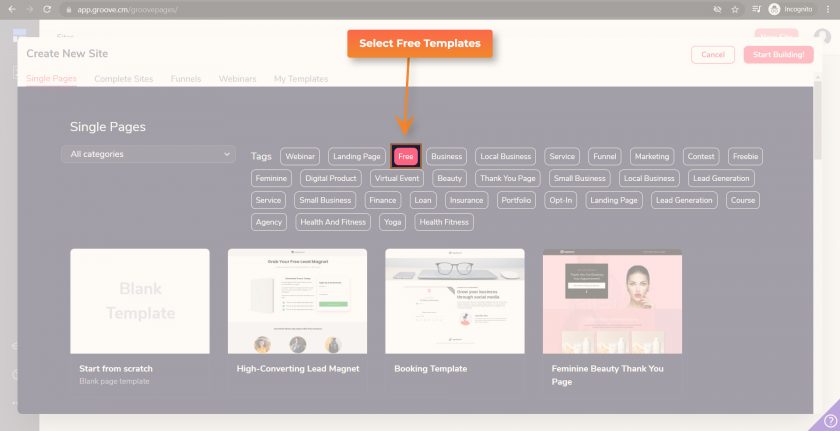
You can also view only Free Templates by selecting Free Filter.
You can preview any template by mouse hover over the template image. You will see two options there. The first is for preview a template and the second is for selecting a template for your website.
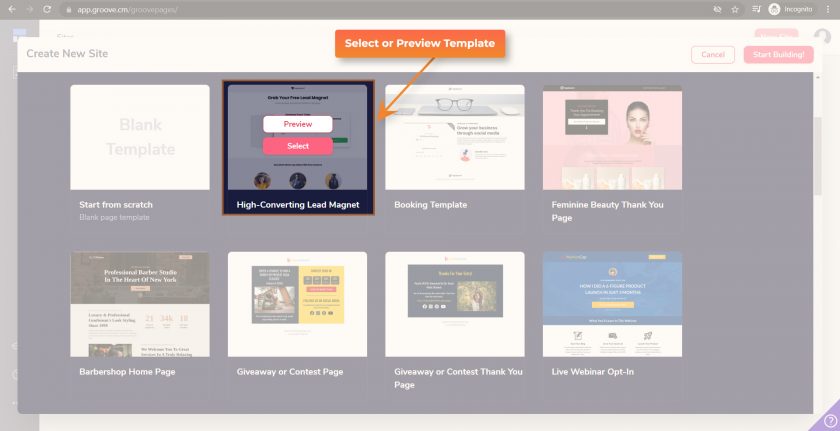
After selecting the template it will prompt for entering your Site Name.
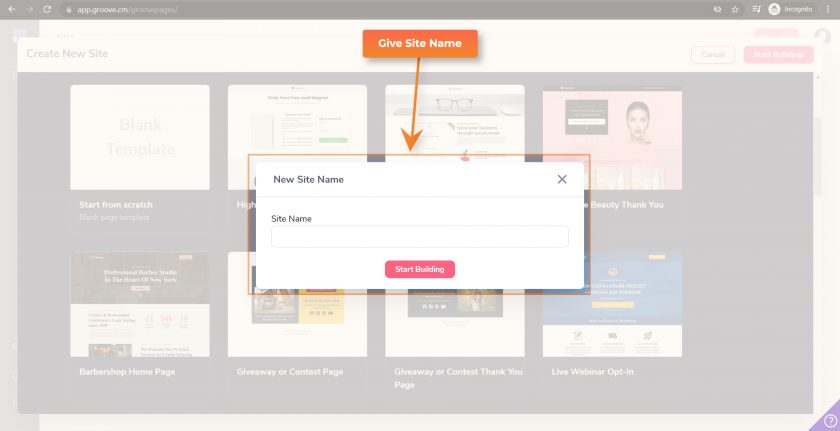
After entering the site name click on the Start Building button.
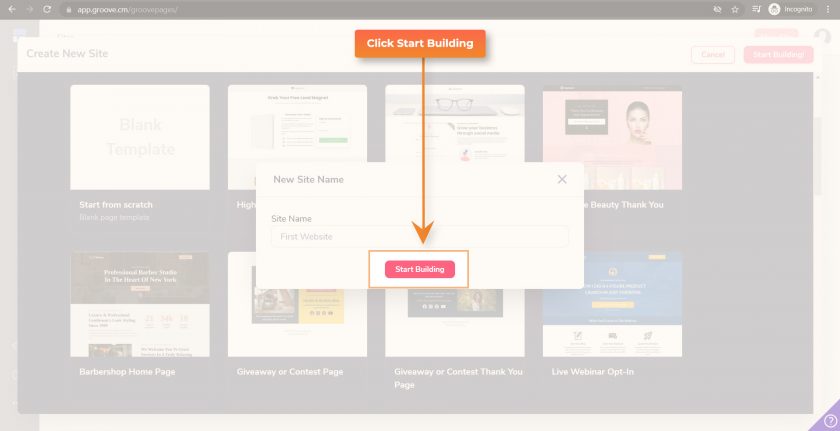
Now you will be presented GroovePages Design Dashboard for the first time. This is your page editor for GroovePages.
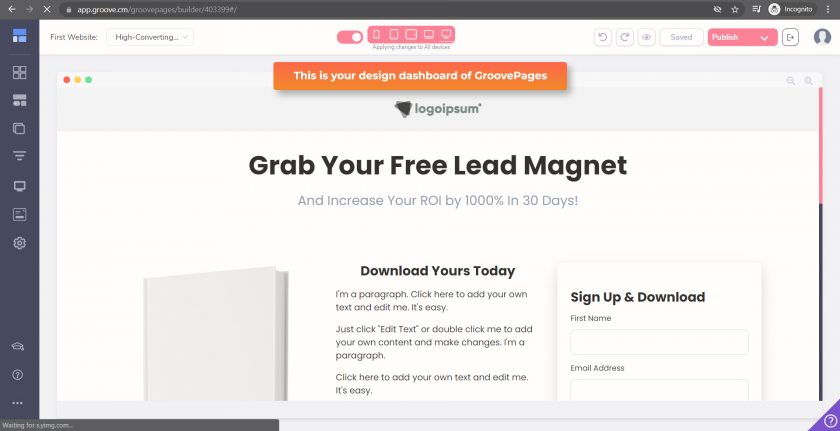
From this dashboard, you can manage your complete website. You can also edit your pages with the same dashboard.
There are also many pre-designed blocks that you can easily use by drag and drop page builder.
To access pre-designed blocks click on the Blocks icon.
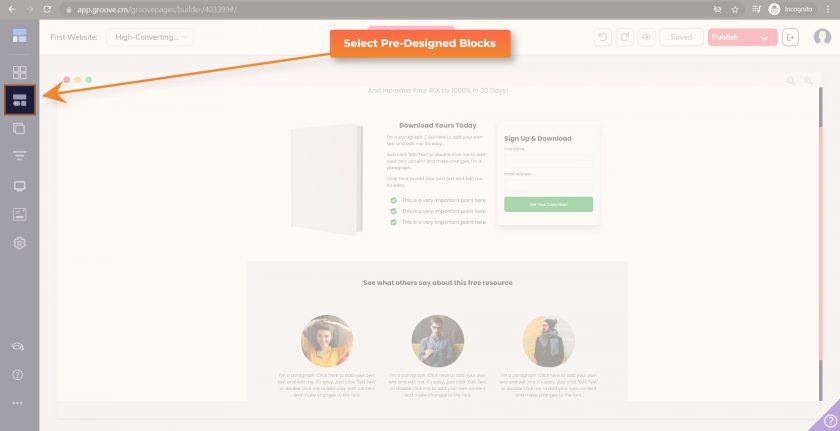
Here you will find all types of blocks which we use on regular basis on a website.

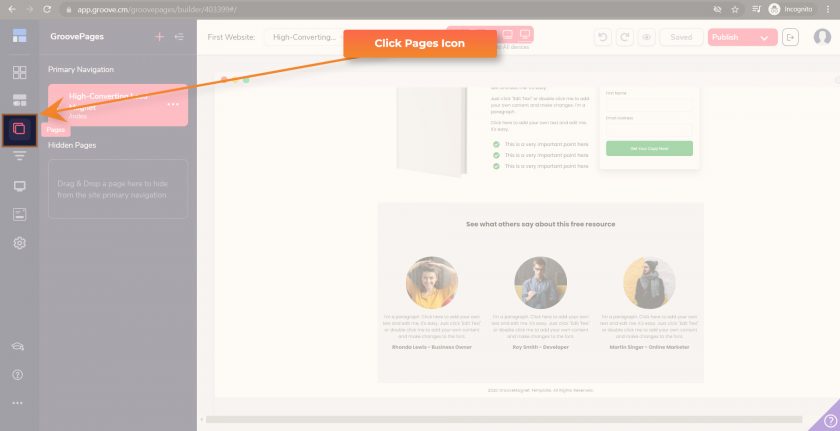
To manage pages click on the Pages icon.
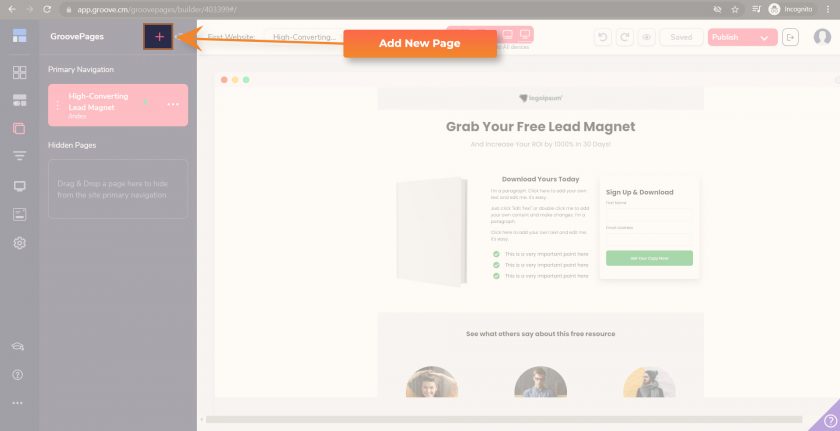
To add a new Page click on + (Plus) Icon
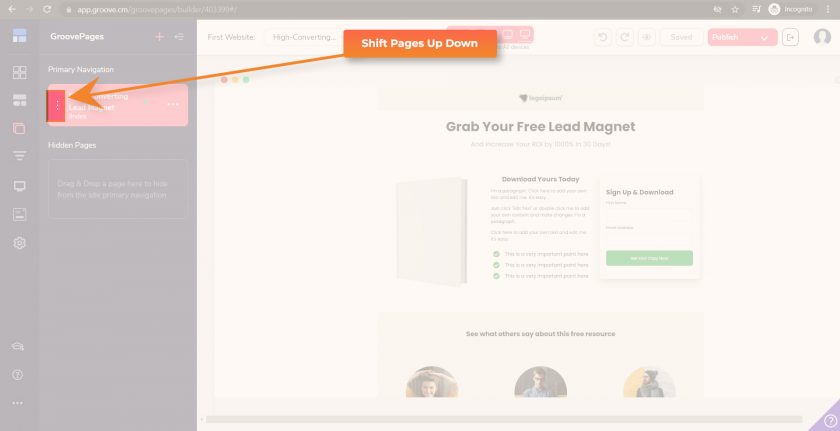
You can also update the order of pages by dragging them up and down.
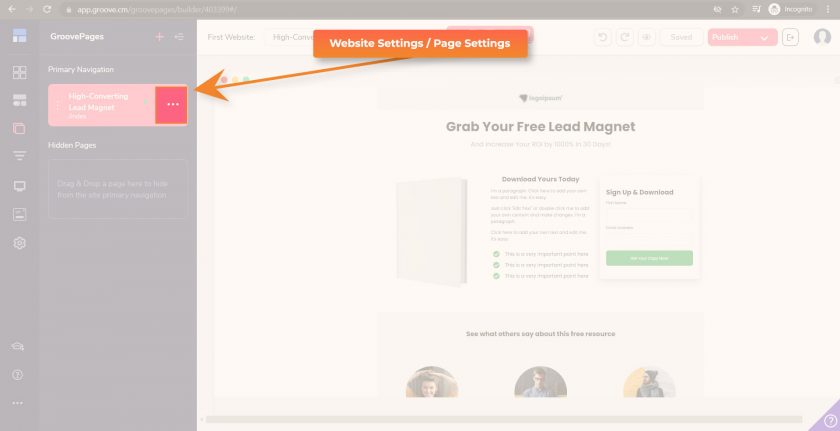
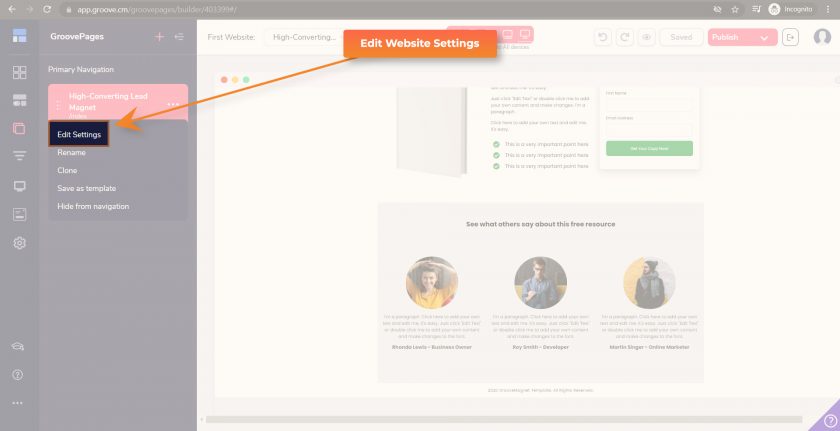
You can also update website settings and page settings by clicking three dots.
Now click on the Edit Settings menu.
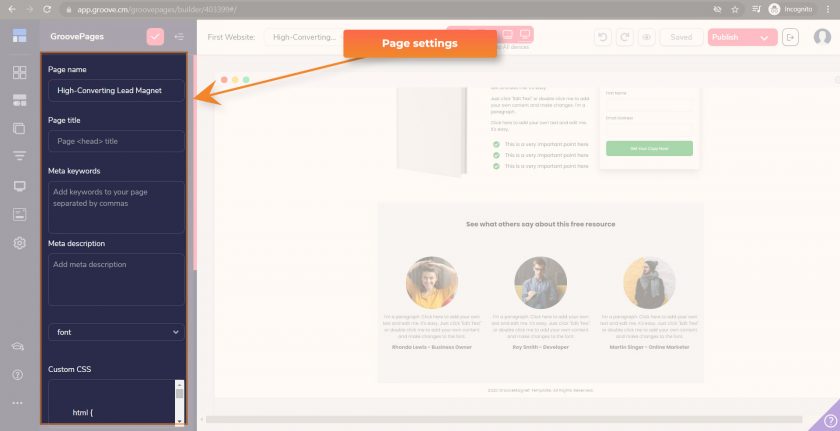
Here you can update Page Title, Page Meta Keywords, Meta Description & Custom CSS. You can also select default fonts for the page.
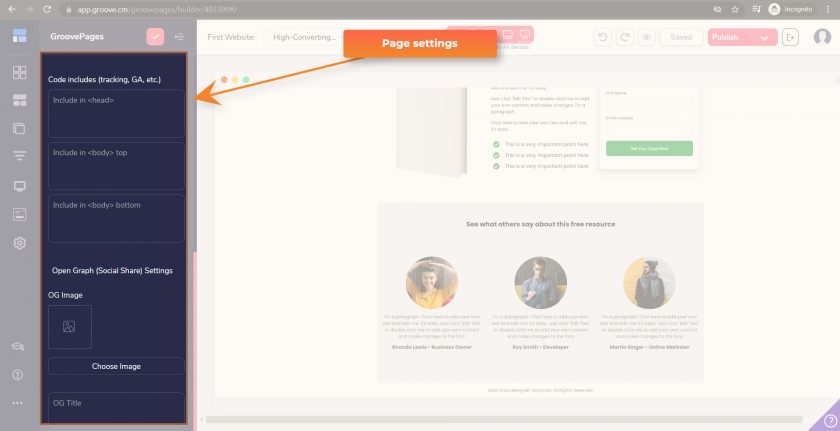
You will find out more options like custom javascript codes for the header, footer & body by scrolling down. Here you will also find settings for the open graph image.
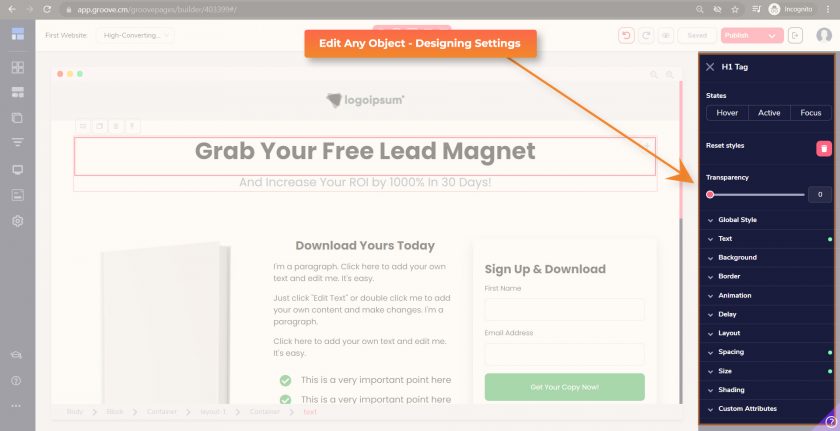
People always ask how to edit any object like Heading or Paragraph or Image. You can simply edit any object by clicking on that object. One designing panel will open from the right side.
Here you can modify the Text Style, Background, Border, Animation, Layout, Spacing, Size & Shading of any object.
Publish Your Website
How to Publish Website on GroovePages
After building all the pages of your website now is the time to go live. To go live on the web you need to publish your website.
We have already set up our subdomain before. So now we can easily publish your website on your subdomain now.
First of all click on the Publish button.
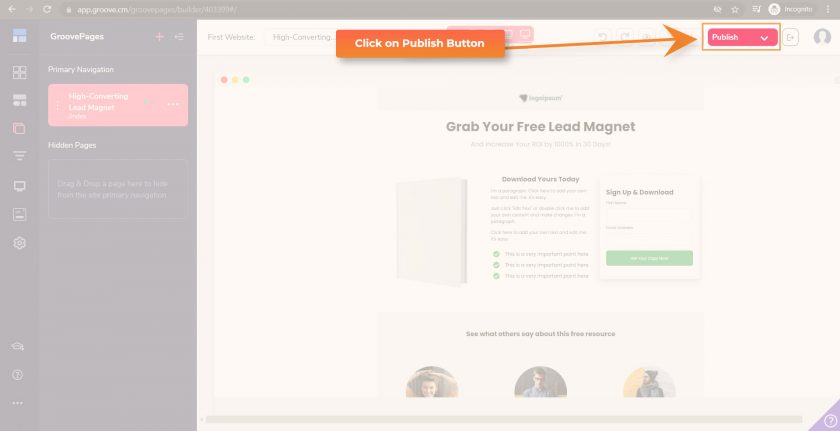
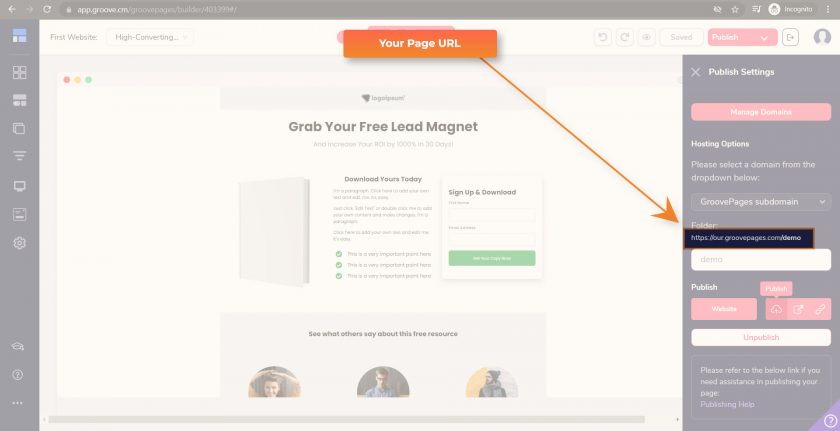
Now publish settings will open where you can make necessary settings like page URL. Now select the GroovePages subdomain from the Select domain type dropdown menu.
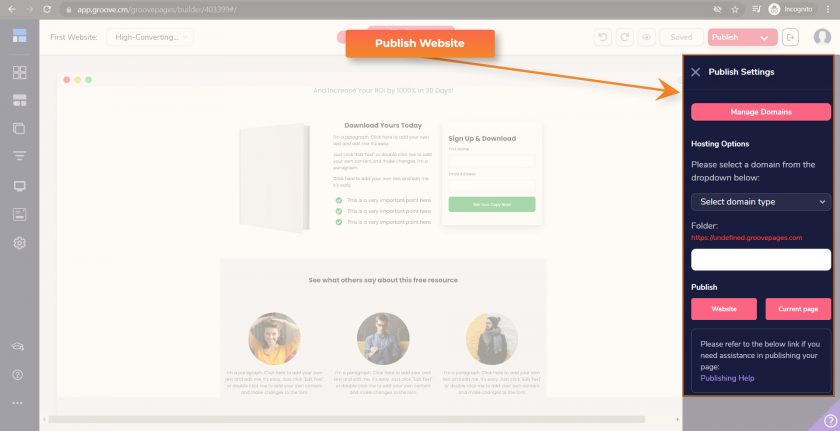
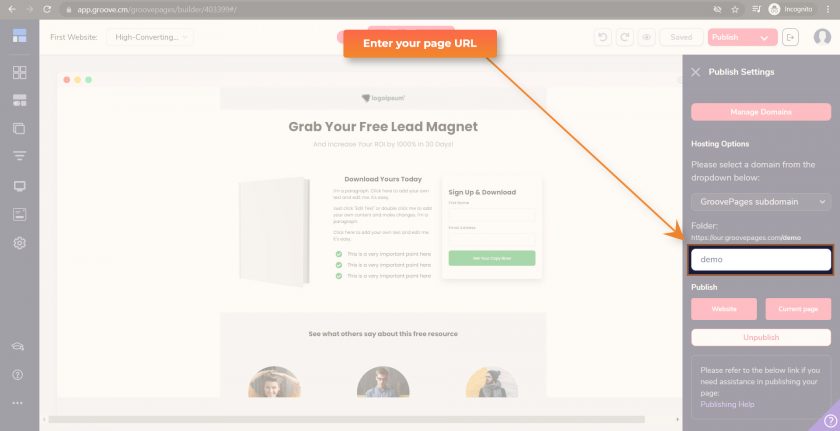
Now give your page URL in the text box under the Folder title.
You can publish only a single page or complete website with one click.

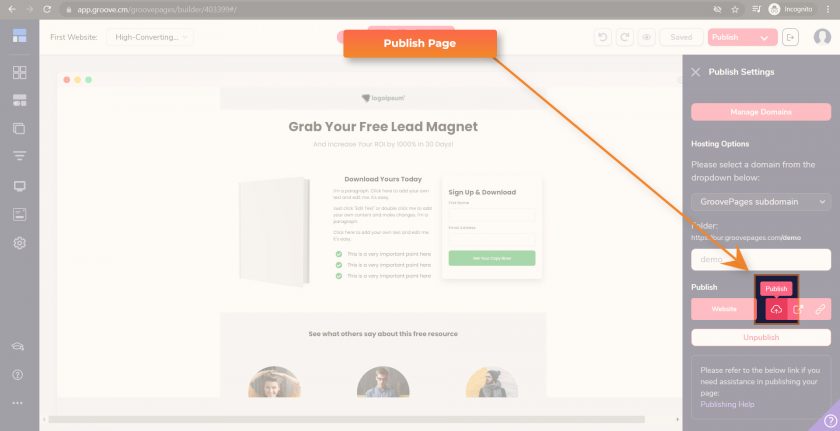
Now your website is published and you can access it live from the URL mentioned on the publish settings.
Generally, GroovePages publish websites immediately but sometimes it may take 5 to 10 minutes.
Now you know how to create websites with GroovePages for Free.
We have covered all the important things which will help you to start with the GroovePages in this tutorial.
Now you know How to use GroovePages!
If you have any queries you can always let us know with the comments box or write us at ce@quickinfo4u.com.
I hope you enjoyed this guide.
You can always share this with your loved ones to make their lives better.


